Restocking your inventory in ForecxtIQ is a seamless process that involves creating purchase orders with your suppliers. Follow this detailed guide to efficiently create and manage purchase orders.
Steps to Create a Purchase Order in ForecxtIQ:
- Access the Purchase Order Menu
- From the left-hand navigation panel, select the Purchase Order menu.
- The Purchase Order Dashboard will appear on the right side of the screen, displaying all previously created purchase orders.

2. Create a New Purchase Order
- To add a new purchase order, click the New Purchase Order button located at the top-right corner of the dashboard.
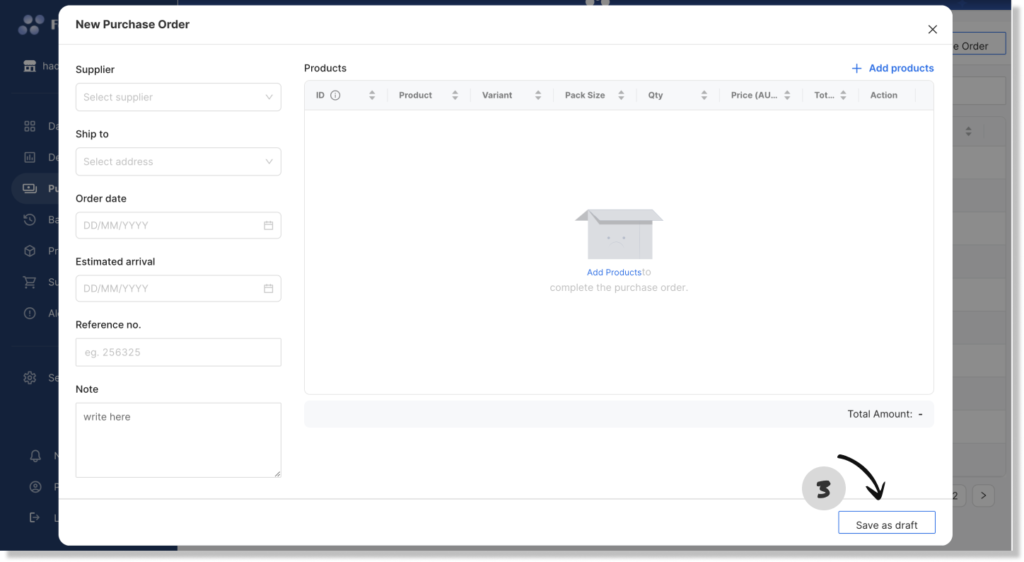
- A dialog box will appear, split into two sections:
On the left side, fill in details such as Supplier, Ship to address, Order Date, Estimated Delivery Date, Reference Number, and Note.
And On the right side, click Add Product to input the product details, including Product name, Variants, Price, Quantity. - After entering all required details, click Save as Draft. The drafted purchase order will appear in the Purchase Order Dashboard list, marked with a Draft tag for easy identification.

3. Approve the Drafted Purchase Order
To approve the order, click on the Drafted Purchase Order from the dashboard list.
After reviewing the details, select Mark as Approved to finalize the purchase order and trigger the inventory restocking process.

4. Communicate with Supplier
You can either email the purchase order directly to your supplier from ForecxtIQ or download a PDF copy for your records.
